# Connecting to an Azure MCA Account
## Basic Configuration Process for the Pier Cloud FinOps Platform
**Welcome to Pier Cloud!**
\
This document aims to serve as a guide to help you prepare the environment so that Pier Cloud can install the Platform modules in your account.
This process will allow Pier Cloud to have read-only access to billing information, with no possibility of modifying or deleting any data in your account. It will also provide read and edit access to items related to optimization (CCA).
The configurations described in this documentation are intended to enable the following modules: Lighthouse and CCA.
### Lighthouse and Cloud Compliance Analyzer (CCA)
Permissions and Service Principal Creation
#### **In the Azure environment:**
1. Log in to your account through the [Azure Portal](https://azure.microsoft.com/pt-br/get-started/azure-portal) and access the Microsoft Entra ID menu. This Service Principal can be used for Lighthouse, CCA, Reservations, and Savings Plans.
2. In the Microsoft Entra ID section, select App registrations from the side menu.
3. Click the + Add button and then select App registration.
4. Enter the desired application name. In Supported account types, choose Accounts in any organizational directory (Multitenant), and complete the process by clicking Register.
5. After creating the application, generate a client secret.
6. Click **+ New client secret**, In the side form, click **Add**.
7. Copy the **generated secret value** and its **expiration date**, and save them in a secure location.
8. Click **Overview** and copy the following values **Application (client) ID, Directory (tenant) ID** and save them together with the previously collected information.
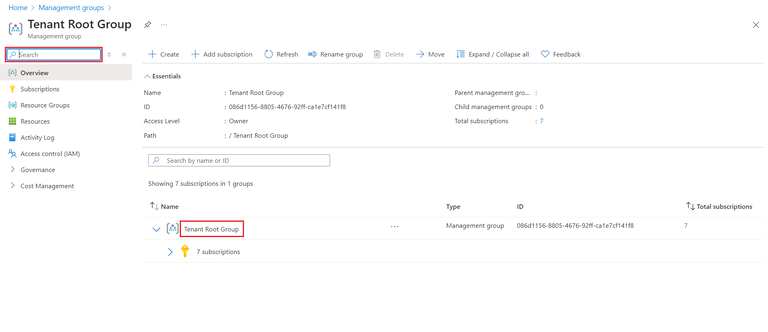
9. To finalize the process, it will be necessary to assign the Reader role at the Tenant level to the created Service Principal. In the search bar, look for **Management Groups**, then click on the **Tenant** to which the permission will be granted.
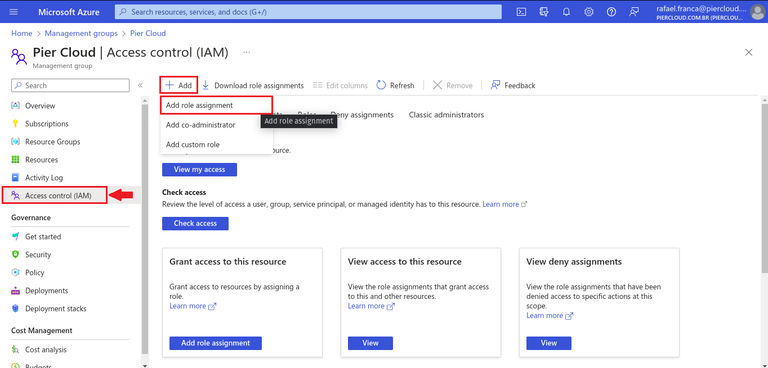
10. Now, click on **Access control (IAM)**, then click on **+ Add** and select **Add role assignment**.
11. Search for **Reader** and click **Next**.
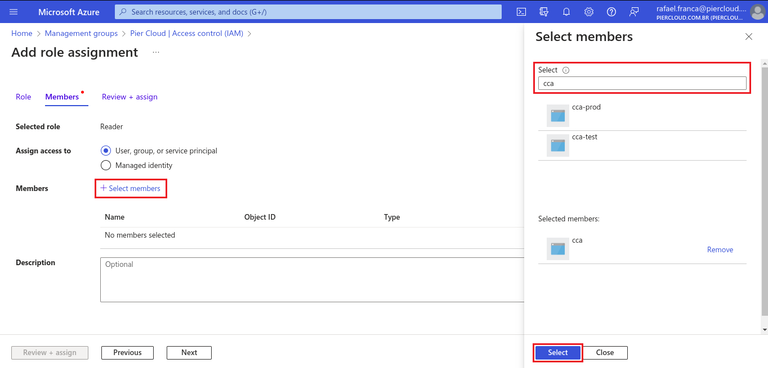
12. On the next page, click **Select members**, search for the **Service Principal** in the left-side panel, **select** it, and click **Select**.
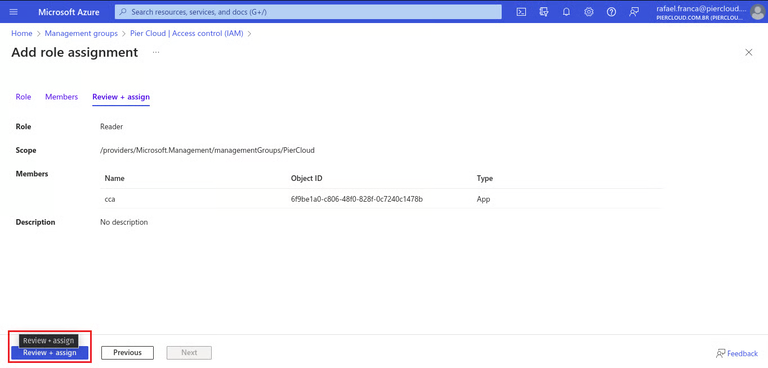
13. To finish, click **Review + assign**.
#### In the Pier Cloud Platform:
#### **Secret Creation**
1. By clicking on the user profile icon and selecting the “**Settings**” option, as illustrated below:
2. The system will display a side menu with several configuration options. Click on the “**Secrets**” feature and then on “**Add**”, as illustrated below.
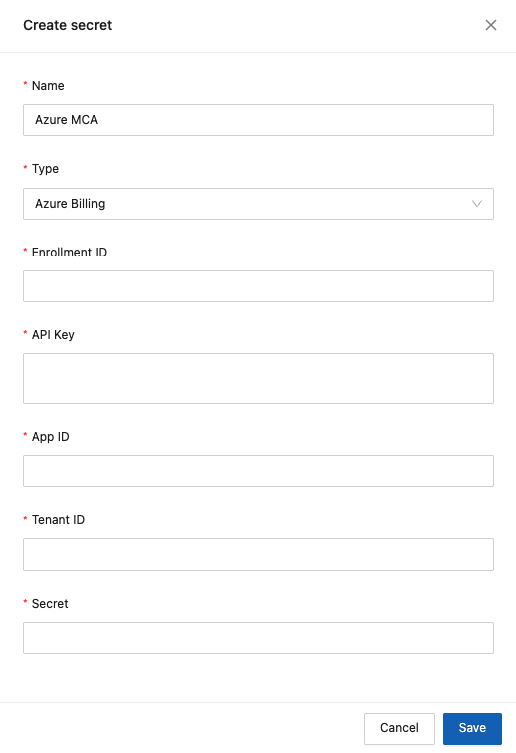
2. The system will display the secret registration screen, where you will need to fill in the following information:
* **Name**: Provide a name that identifies the secret being created.
* **Type**: Select Azure Billing.
* **Enrollment** **ID**: Enter the **Billing Account ID** information collected in step 3.1 in the Azure environment.
* **API** **Key**: This information will be a combination of the environment + secret + App ID.
* **App** **ID**: Enter the **Application (client) ID** information copied in step 8 from the Azure environment.
* **Tenant ID**: Enter the **Directory (tenant) ID** information copied in step 8 from the Azure environment.
* **Secret**: Enter the **Secret Value** information copied in step 7 from the Azure environment.
3. After completing the fields, click the **Save** button and your secret will be generated.
#### **Billing Connector Creation**
1. To proceed with the configuration, click on the **Billing Connector** feature in the side menu, and then click **Add Connector**.
2. The system will display the Billing Connector registration screen, where you will need to fill in the following information:
* **Type**: Select **Standard**.
* **Cloud Provider**: Select **Azure (Microsoft Azure)**.
* **Billing Connector Identification**: Provide a name that identifies the billing connector.
* **Select the secret for this billing connector**: Select the secret created in step 2 related to **Secret creation**.
* **Billing Type**: Select **MCA**.
* **Region**: Select the “**Standard**” option.
3. Finally, click **Save** and your Azure MCA billing connector will be successfully configured.