# OpenAI Provider

## OpenAI Configuration Process.

#### Welcome to Pier Cloud!

This document is intended to be a guide so that you can perform the necessary configuration so that you can connect the Pier Cloud platform with OpenAI.

Below you will find a detailed process that explains each step clearly and objectively.

### In the OpenAI environment

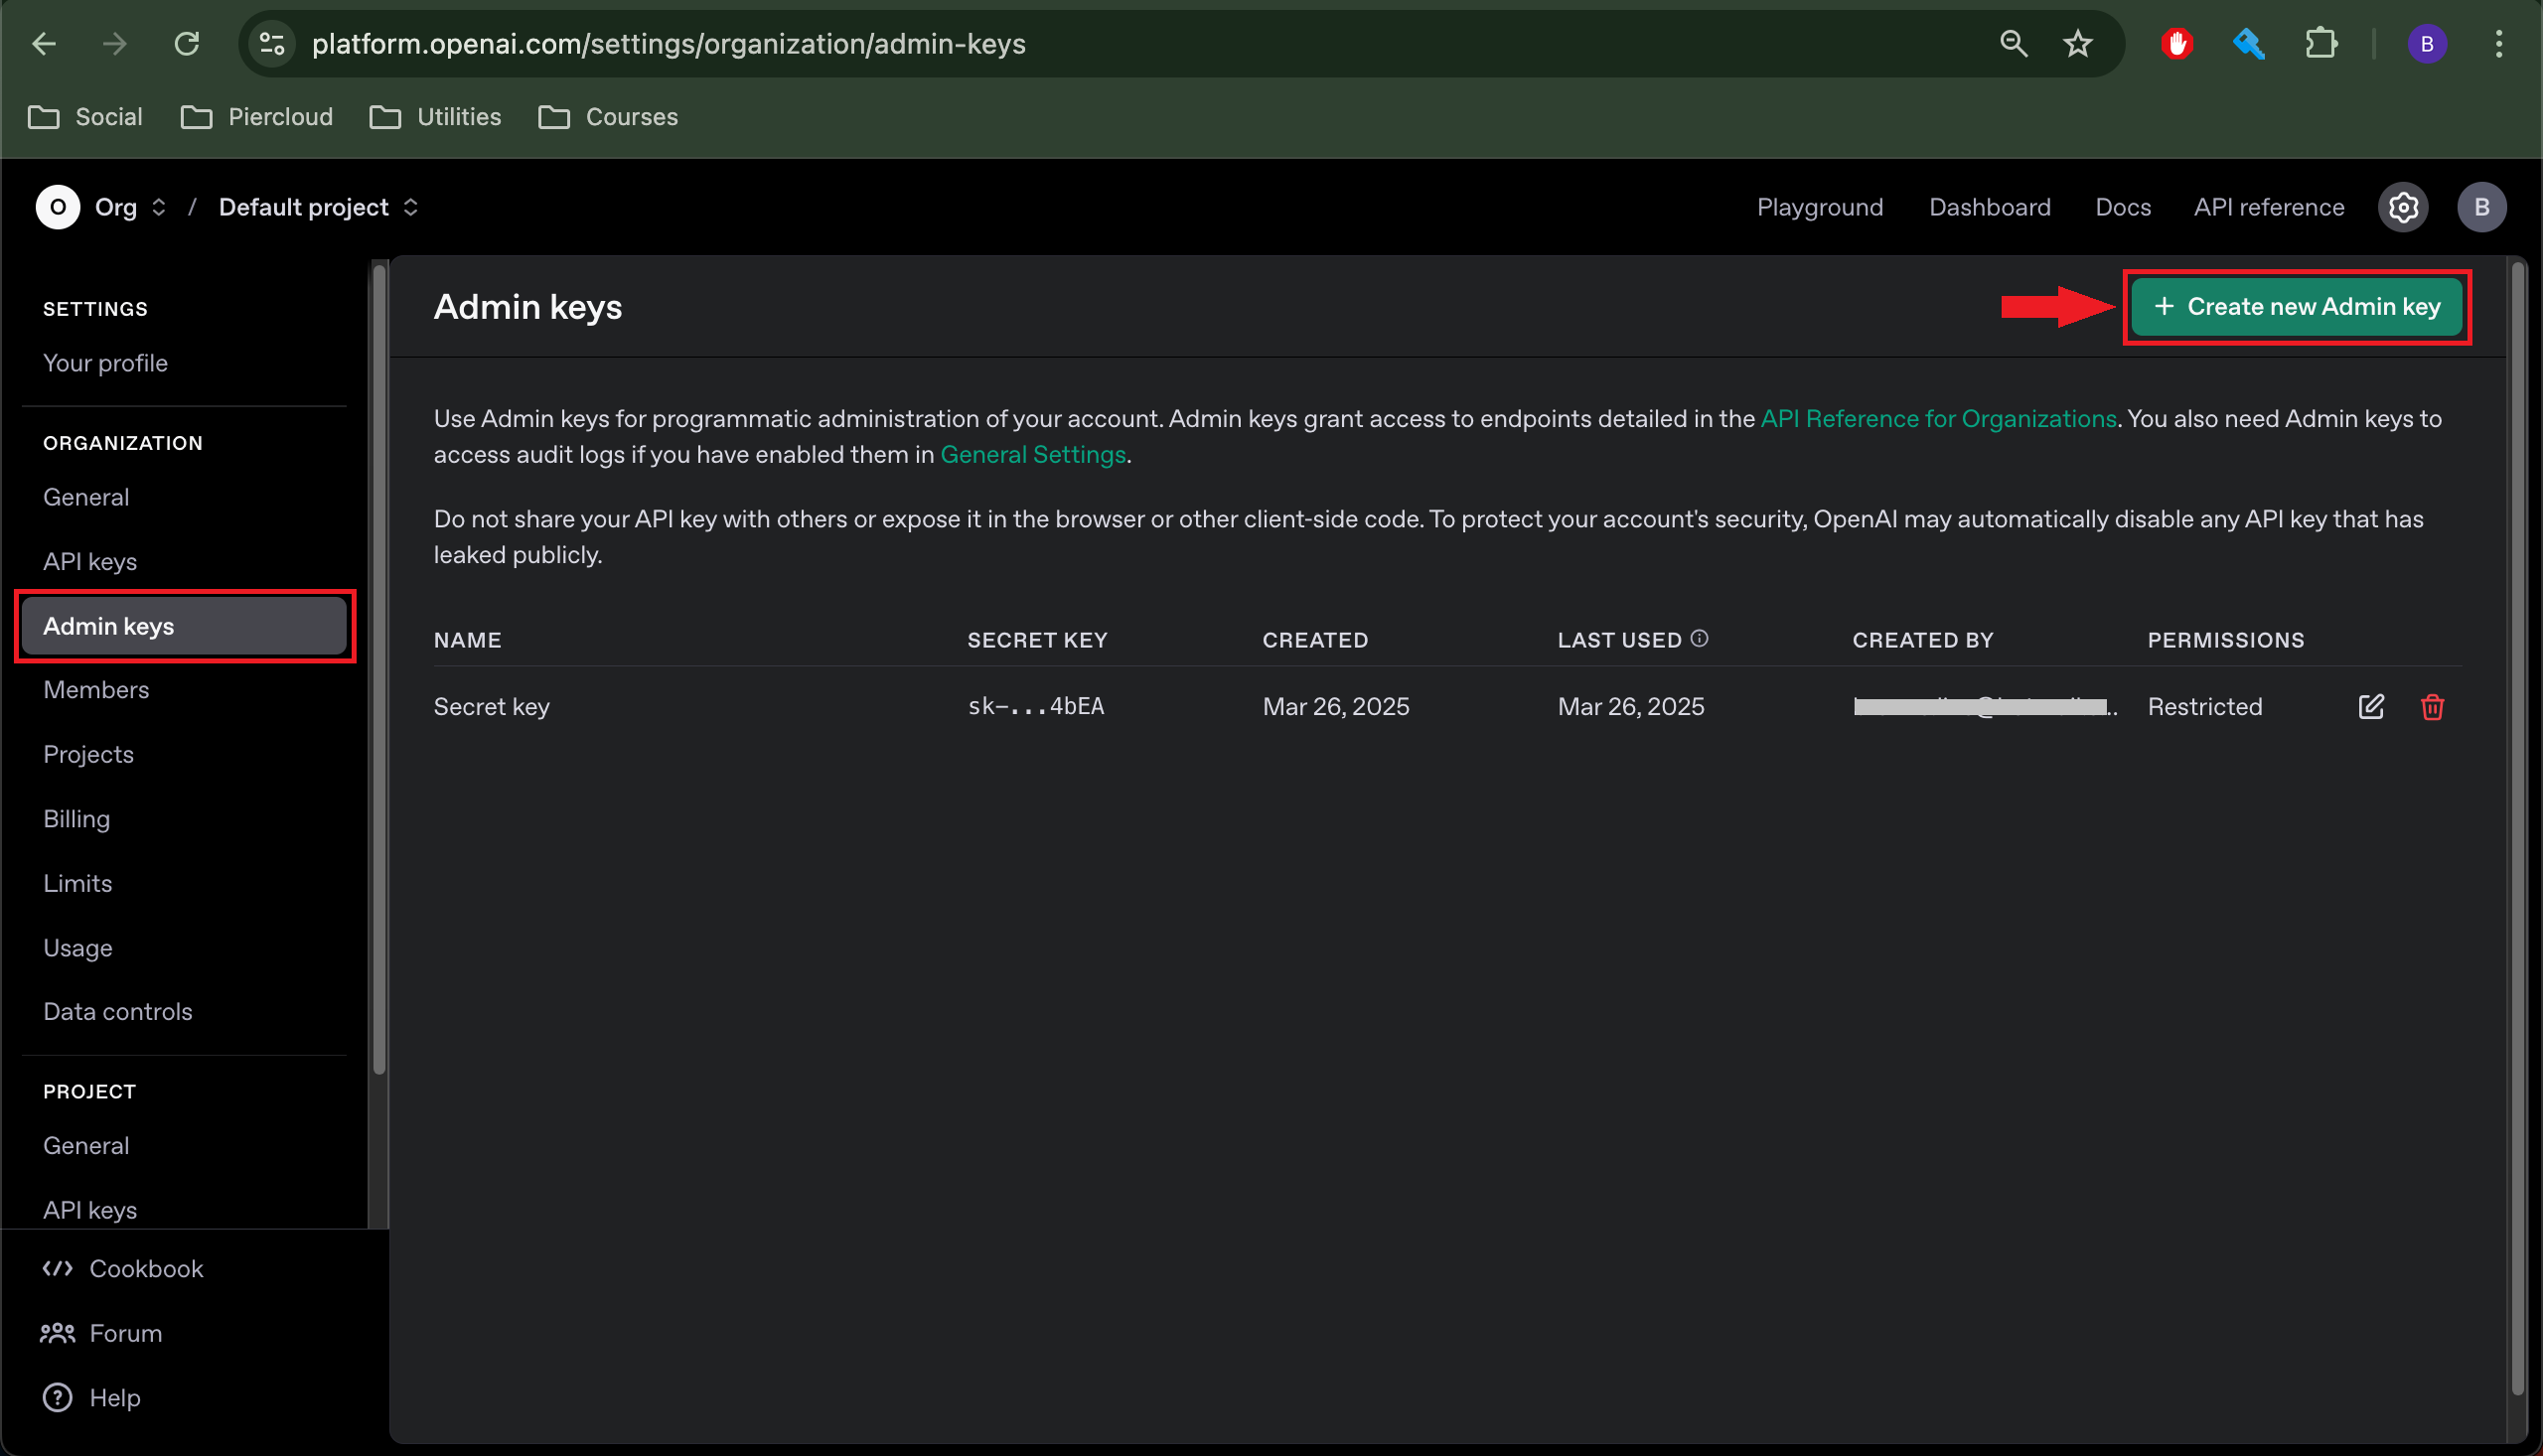
1. Access the OpenAI environment through the [link](https://platform.openai.com/settings/organization/admin-keys), and click on the **+ Create new Admin Key** option, as illustrated below, to create a new Api Key that will be used to create the Secret:

**Note: To access the URL provided, you will need administrator permission to create an Admin key.**

<figure><img src="https://1687673077-files.gitbook.io/~/files/v0/b/gitbook-x-prod.appspot.com/o/spaces%2FZ9sinLUl52lDK1vg6b8g%2Fuploads%2F8w85Wgwc6JObpbB7kH9g%2Fimage.png?alt=media&#x26;token=4890eb2c-ef45-4ec9-a6fc-ce3253d99645" alt=""><figcaption></figcaption></figure>

2. The system will display the screen for creating the **Admin Key**, where you will need to provide a **name** that identifies the admin key, as illustrated below:

<figure><img src="https://1687673077-files.gitbook.io/~/files/v0/b/gitbook-x-prod.appspot.com/o/spaces%2FZ9sinLUl52lDK1vg6b8g%2Fuploads%2FW49I98juFjxP5V6zX97h%2Fimage.png?alt=media&#x26;token=ee936bc2-d827-4902-8429-19375b27a42a" alt=""><figcaption></figcaption></figure>

3. Then, select the **Read only** permission option and click on the "**Create new admin key**" button, as illustrated below:

<figure><img src="https://1687673077-files.gitbook.io/~/files/v0/b/gitbook-x-prod.appspot.com/o/spaces%2FZ9sinLUl52lDK1vg6b8g%2Fuploads%2FqmKK9AYusYX2z0WcxmXD%2Fimage.png?alt=media&#x26;token=489c8bb2-c9c4-43c8-a80c-d444a53d67cc" alt=""><figcaption></figcaption></figure>

4. The system will display the created Key, which must be copied and stored in a safe location to be used to create the Secret:

<figure><img src="https://1687673077-files.gitbook.io/~/files/v0/b/gitbook-x-prod.appspot.com/o/spaces%2FZ9sinLUl52lDK1vg6b8g%2Fuploads%2F74dTLfyWNTe2RuG4R6BP%2Fimage.png?alt=media&#x26;token=6da70813-e3c5-4d7b-ad06-88f8bc8dbd0e" alt=""><figcaption></figcaption></figure>

5. Finally, click **Done** to exit the screen.

**Note: When you click Done, you will not be able to view the created key again.**

### On the Pier Cloud Platform

1. On the Pier Cloud Platform, click on the user icon and then on the **Settings** option.

<figure><img src="https://1687673077-files.gitbook.io/~/files/v0/b/gitbook-x-prod.appspot.com/o/spaces%2FZ9sinLUl52lDK1vg6b8g%2Fuploads%2FCHGnCUyHOqrLdvbEFWZr%2Fimage.png?alt=media&#x26;token=7da4de41-e9f5-4322-842b-1e68047488bf" alt=""><figcaption></figcaption></figure>

#### Secret Creation:

2. The system will display the Features Menu on the left side. Click on the **Secrets** option and then on the **+ Add** button in the upper right corner to create the Secret.

<figure><img src="https://1687673077-files.gitbook.io/~/files/v0/b/gitbook-x-prod.appspot.com/o/spaces%2FZ9sinLUl52lDK1vg6b8g%2Fuploads%2FRmamWHN6Rg0FIMsNvOk9%2Fimage.png?alt=media&#x26;token=7ed4c602-49e6-4c3b-95c7-c4fa9cb79260" alt=""><figcaption></figcaption></figure>

3. In this step we will configure the secret, in the **Name** field, we will add the name to identify the Secret, in the **Type** field we will select the type of secret, in this case we will select **Api Key**, as shown in the image below:

<figure><img src="https://1687673077-files.gitbook.io/~/files/v0/b/gitbook-x-prod.appspot.com/o/spaces%2FZ9sinLUl52lDK1vg6b8g%2Fuploads%2FbhU4S1njy88GmAEElvUB%2Fimage.png?alt=media&#x26;token=d4f385a8-b2fa-471d-aadb-7dd812d35da6" alt=""><figcaption></figcaption></figure>

4. After selecting the Type, the system will display the **API Key**, where we will paste the **Admin Key** collected in the OpenAI environment (copied in step 4), then click **Save** to create the Secret.

<figure><img src="https://1687673077-files.gitbook.io/~/files/v0/b/gitbook-x-prod.appspot.com/o/spaces%2FZ9sinLUl52lDK1vg6b8g%2Fuploads%2FZhlTXpv4yYJVMACYY1hd%2Fimage.png?alt=media&#x26;token=48dbfd7a-d928-403e-8a1f-771ca00850da" alt=""><figcaption></figcaption></figure>

5. That's it, Secret created successfully!

#### Creating Data Connectors

6. In the functionality menu on the left, click on the **Data Connectors** option and then on the **+ Add** button in the upper right corner to create the Data Connector.

<figure><img src="https://1687673077-files.gitbook.io/~/files/v0/b/gitbook-x-prod.appspot.com/o/spaces%2FZ9sinLUl52lDK1vg6b8g%2Fuploads%2FURxENLxAbdpcsXpndMo5%2Fimage.png?alt=media&#x26;token=cfe39453-4db6-4f48-8a5d-89df00a77f9b" alt=""><figcaption></figcaption></figure>

7. In this step we will configure the Data Connector, in the **Data Connector** field, we will select the **OpenAI** option, as shown in the image below, and in the **Data Connector Identifier Name** field we will add a **name** to identify the Data Connector to be created:

<figure><img src="https://1687673077-files.gitbook.io/~/files/v0/b/gitbook-x-prod.appspot.com/o/spaces%2FZ9sinLUl52lDK1vg6b8g%2Fuploads%2FmqKr4MFM5s18eTsxuRkL%2Fimage.png?alt=media&#x26;token=0030fac4-120a-42d4-a403-cfd23078c179" alt=""><figcaption></figcaption></figure>

<figure><img src="https://1687673077-files.gitbook.io/~/files/v0/b/gitbook-x-prod.appspot.com/o/spaces%2FZ9sinLUl52lDK1vg6b8g%2Fuploads%2FOyO3YTvuhT4HonVtpaOF%2Fimage.png?alt=media&#x26;token=20154221-6c71-485d-80be-853c64462242" alt=""><figcaption></figcaption></figure>

8. After selecting the desired Data Connector, the system will display an additional field to be filled in:

* **Select the secret for this data connector**: In this field, we must enter the secret created previously in step 3.

<figure><img src="https://1687673077-files.gitbook.io/~/files/v0/b/gitbook-x-prod.appspot.com/o/spaces%2FZ9sinLUl52lDK1vg6b8g%2Fuploads%2FRotvLdy4lNvrU9Kj4mEE%2Fimage.png?alt=media&#x26;token=d1581e3e-90de-4069-88e5-74ef22b09208" alt=""><figcaption></figcaption></figure>

9. Finally, click the **Save** button to create the new Data Connector.
