# Datadog Integration

## Datadog Configuration Process.

#### Welcome to Pier Cloud!

This document aims to be a guide so that you can prepare the environment to connect the Pier Cloud platform with Datadog using an API connection.

### In the Datadog environment

#### PART I: Creating API KEY and APPLICATION KEY

As a premise, we need to create an API KEY and an APPLICATION KEY in Datadog.\
We will present a step-by-step guide on how to do this.

#### To start the integration process with the Platform, it is necessary to create an API KEY in Datadog.

1. Click on your user, then on API Keys, as shown in the image below:

<figure><img src="https://lh7-rt.googleusercontent.com/slidesz/AGV_vUdxdjkip3fa7G9ogh0Jez4H4aQm122ChKF1_kXAf9b11P38IqDIQ9H2foDAWRg-w-PB-rp43JkXuusWVUTgSxOC1CV5s93k3rzqG81s9dhbqY5PWIj9MQseQkhMWrG-xrUmH2hvRNprIZtMzwrQId9J9ymIudXBlOC_CzX1bt8o5w=s2048?key=f42TckAHfw7FOkWO0ZMHHQ" alt=""><figcaption></figcaption></figure>

2. In this step, click on **+ New Key** to create a new API Key.

<figure><img src="https://lh7-rt.googleusercontent.com/slidesz/AGV_vUfD0Btzcxi7Hxxd0jk8gRmoeRSbX9wQvipHZcE28DQtK0BxGA7aYQmSgyZHRav5r8H3sFcht1Eu50LwcNgs_Xtv5NO_d3aUB4utSCCGo-gUSUfKurLzVEHHdASrBtCGxZgnXEwWie2csXYuIGiRZYL5hZLbFKWk2GMYNni7JD1h=s2048?key=f42TckAHfw7FOkWO0ZMHHQ" alt=""><figcaption></figcaption></figure>

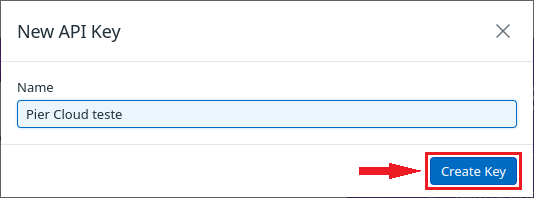
2.1. After clicking on **New Key**, a window will open to enter the name of the **API Key**, in this case the name Pier Cloud test was used (however, the name of the project, etc. can be added) then click on **Create Key**.

<figure><img src="https://1687673077-files.gitbook.io/~/files/v0/b/gitbook-x-prod.appspot.com/o/spaces%2FZ9sinLUl52lDK1vg6b8g%2Fuploads%2Fz0mOox8CCd3q28fmizgv%2Fimage.png?alt=media&#x26;token=388934a0-8a73-428a-bc23-aa40c9db49e7" alt="" width="401"><figcaption></figcaption></figure>

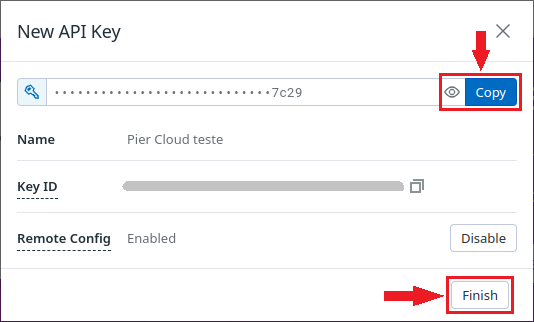
2.2. After creating the API Key name, you will be redirected to this step, Click **Copy**, to copy the generated key and paste it into a notepad, then click **finish.** The API Key was created successfully.

<figure><img src="https://1687673077-files.gitbook.io/~/files/v0/b/gitbook-x-prod.appspot.com/o/spaces%2FZ9sinLUl52lDK1vg6b8g%2Fuploads%2FFgpskmAJkw4Cnepm4GXR%2Fimage.png?alt=media&#x26;token=715457f3-7e4a-4e62-b9df-33432326ba93" alt="" width="401"><figcaption></figcaption></figure>

3. Here, you can view the **API Key** created as shown in the image below:

<figure><img src="https://lh7-rt.googleusercontent.com/slidesz/AGV_vUcLORlD1kZLeHAYCngUXQYTEnekMXs0NFhs-KWlKgdQr12vhLlppdhiK9dF3dC8pmPfSuOHQm1fvIfp_yYjC5PvsmbbyMygUFC-uRP6xLb05XKv9pIiA7hEZg3BFu_-AGH-sl-DYRm3jzBbUGkBLxcdna3x3XCcX26Iioj1bpiRrQ=s2048?key=f42TckAHfw7FOkWO0ZMHHQ" alt=""><figcaption></figcaption></figure>

4. In this step it will be necessary to create an **Application Key**, click on Application Keys, as shown in the image below:

<figure><img src="https://lh7-rt.googleusercontent.com/slidesz/AGV_vUcJjgIS4qXeYbQ9EoFXYWTZbY789vNbsGjdEvpE01gXJCBtnMSETQP1f5PtjTm5I6M0usg9rUI7_2DOo1y08sXQx_UYDtrKvbCYI0uC5ZDdapwWOqY-fIDX3MpMPDBJGsX2PTZnqcO6FYeIYHQ0buVBEoEbTmpZvs1rDEohKRdmnA=s2048?key=f42TckAHfw7FOkWO0ZMHHQ" alt=""><figcaption></figcaption></figure>

4.1. Here click on **+ New Key**.

<figure><img src="https://lh7-rt.googleusercontent.com/slidesz/AGV_vUcJjgIS4qXeYbQ9EoFXYWTZbY789vNbsGjdEvpE01gXJCBtnMSETQP1f5PtjTm5I6M0usg9rUI7_2DOo1y08sXQx_UYDtrKvbCYI0uC5ZDdapwWOqY-fIDX3MpMPDBJGsX2PTZnqcO6FYeIYHQ0buVBEoEbTmpZvs1rDEohKRdmnA=s2048?key=f42TckAHfw7FOkWO0ZMHHQ" alt=""><figcaption></figcaption></figure>

4.2. In this step, enter the name of the application key, then click **Create Key**.

<figure><img src="https://lh7-rt.googleusercontent.com/slidesz/AGV_vUenstvXkPCFvakQ-AKXYUrJINp2CkEGjRTlMCC24rblMJA7bP8AkJWXpiBNEUzFL4gblFX7SVC9aeyKmwTAslnHKJNAH2WJlG8v3W8KjEx9SkMuk_QtTezJqx_joFepb4YUBcXzopp1oWJxKLNBiPdM9I0UdaXFzDq2a74Nj5mG=s2048?key=f42TckAHfw7FOkWO0ZMHHQ" alt=""><figcaption></figcaption></figure>

4.3. Here you will need to select the scopes, click **Edit**, as shown in the image below:

<figure><img src="https://lh7-rt.googleusercontent.com/slidesz/AGV_vUfaZqWohBrU1KWQqF2R8PGR1L5yc11Vl1veQdJIvGEorEjPitiHx3P6aOcL2TP1Ifjk0Uo0KSMxOW-JUb6juVjSGB1At8EOA6j_FFBrWPIP6PHlzREvcNhaGf2JOyvlPCaSl6FwdMQYEDJyvioIJPDdbSpeHz5P0_gQ6Surt7lRJQ=s2048?key=f42TckAHfw7FOkWO0ZMHHQ" alt=""><figcaption></figcaption></figure>

4.4. In this step in the search field (Filter Scopes), look for the following scopes:

* timeseries\_query
* metrics\_read
* hosts\_read

After selecting, click **Save** to save the selected items.

<figure><img src="https://lh7-rt.googleusercontent.com/slidesz/AGV_vUcR9jSNIzqZegVriP0F2BPv-GwYNoorbdJh6wpSqhyRSd9y8lDL-cpcLnJTcF9AW6apHRmy9qXWfQQ6w0-m7xSm9b0-HxtcEvJdbEVCT6RtW7ABl9W9LT5rx7bSLrBK_xBHn3xGPWKjuGtGQEKEeLXJTSzkUZ1hDx9kQr2GBjkY=s2048?key=f42TckAHfw7FOkWO0ZMHHQ" alt=""><figcaption></figcaption></figure>

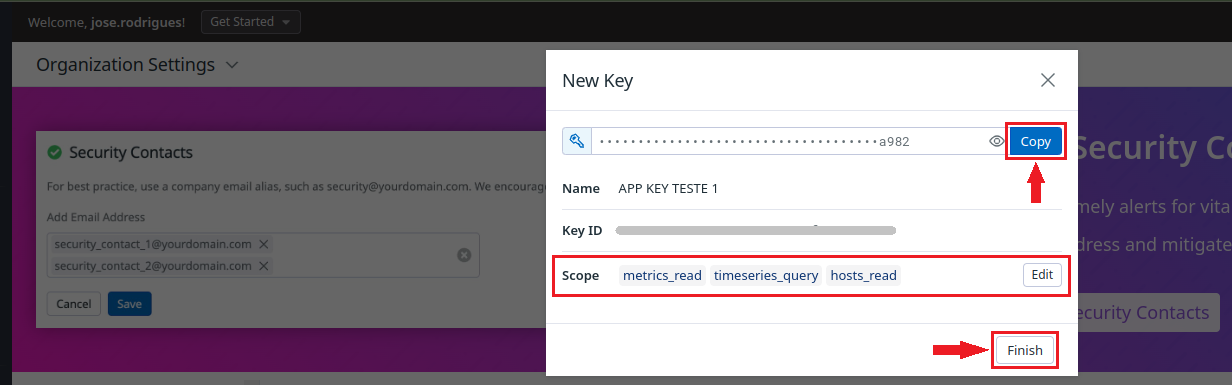
4.5. In this step, click on **Copy** to copy the key (paste it into a notepad), then click on **Finish** to complete the creation of the Application Keys.

Note: Note the selection in blue, where the scopes selected in the previous step appear.

<figure><img src="https://1687673077-files.gitbook.io/~/files/v0/b/gitbook-x-prod.appspot.com/o/spaces%2FZ9sinLUl52lDK1vg6b8g%2Fuploads%2FWdhSbR1J95tdsVv5hGB3%2Fimage.png?alt=media&#x26;token=25824cae-2195-434f-8901-12d341a2dce0" alt=""><figcaption></figcaption></figure>

4.6. Here, you can view the **Application Key** created as shown in the image below:

<figure><img src="https://lh7-rt.googleusercontent.com/slidesz/AGV_vUfIHziYLrqHo4_AuHbVE2MIjVVcKgAcqF7rCgSc9bGhOiU1A2kae7yvvdk7g7_gJ4WNMZ7gdtJY7tibxBA1odmkKeB0dapIG_7TzVowjC9jKj9xbLGP6VKEdTUyOpbehrj7onCCDmI0SkIb0_Q6eFvg67gnMrqIbm6hXO1GB0iV=s2048?key=f42TckAHfw7FOkWO0ZMHHQ" alt=""><figcaption></figcaption></figure>

5. Abaixo estão as informações que deverão ser inseridas na Plataforma da Pier:
   * Key generated in "**API Key**" in Datadog;
   * Key generated in "**APPLICATION Key**" in Datadog
   * Datadog URL

### On the Pier Cloud Platform

#### PART II: Configure the Pier Cloud Platform to receive data from the Datadog integration

After the API KEY and APPLICATION Key have been created, it is necessary to configure the Platform.

**Below we have a step by step guide on how to do this.**

1. On the Pier Cloud platform, click on your user icon, then **settings**.

<figure><img src="https://1687673077-files.gitbook.io/~/files/v0/b/gitbook-x-prod.appspot.com/o/spaces%2FZ9sinLUl52lDK1vg6b8g%2Fuploads%2FCHGnCUyHOqrLdvbEFWZr%2Fimage.png?alt=media&#x26;token=7da4de41-e9f5-4322-842b-1e68047488bf" alt=""><figcaption></figcaption></figure>

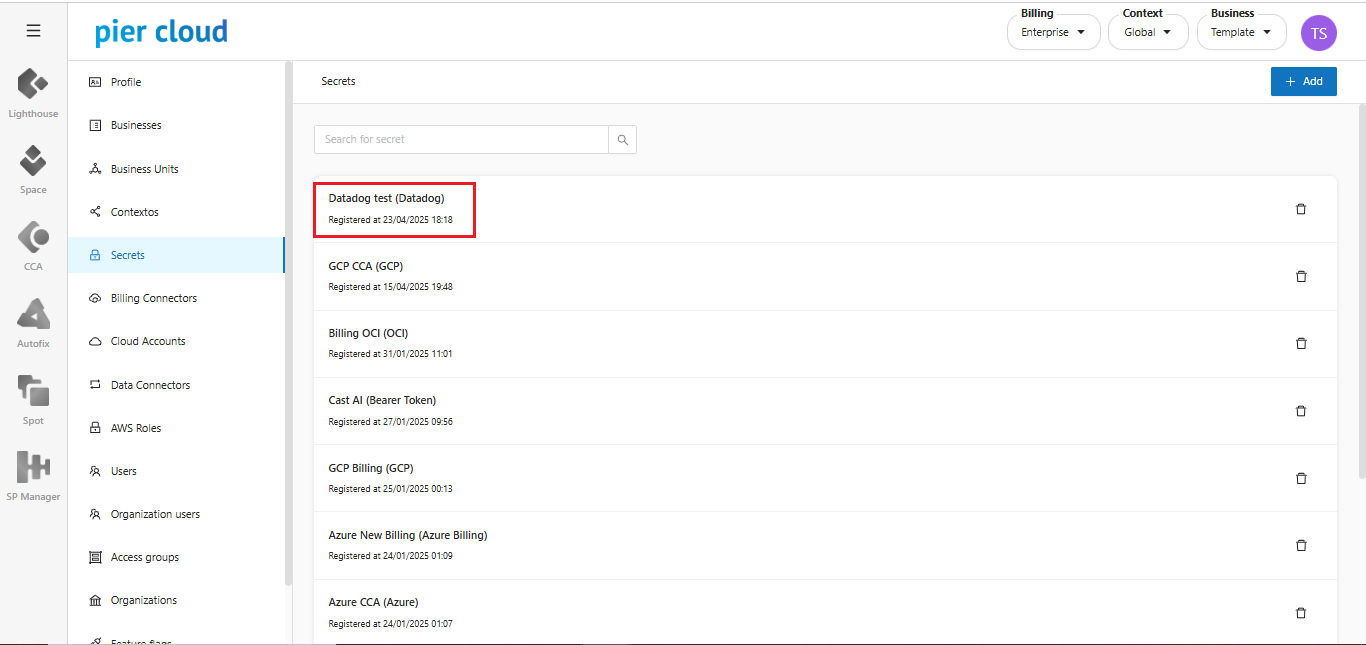
2. Here click on **Secrets**, as shown in the image below:

<figure><img src="https://1687673077-files.gitbook.io/~/files/v0/b/gitbook-x-prod.appspot.com/o/spaces%2FZ9sinLUl52lDK1vg6b8g%2Fuploads%2FlCFh0dkpAN1G5922CRPu%2Fimage.png?alt=media&#x26;token=2d77be68-e6b4-4fdc-883e-eb14c6816f54" alt=""><figcaption></figcaption></figure>

3. In this step, click on **+ Add** to insert the information created on the Datadog platform.

<figure><img src="https://1687673077-files.gitbook.io/~/files/v0/b/gitbook-x-prod.appspot.com/o/spaces%2FZ9sinLUl52lDK1vg6b8g%2Fuploads%2FgBznvEpbNq65e5Go36Mx%2Fimage.png?alt=media&#x26;token=c163a57c-b05b-41e5-b65c-d1f43ef18dcb" alt=""><figcaption></figcaption></figure>

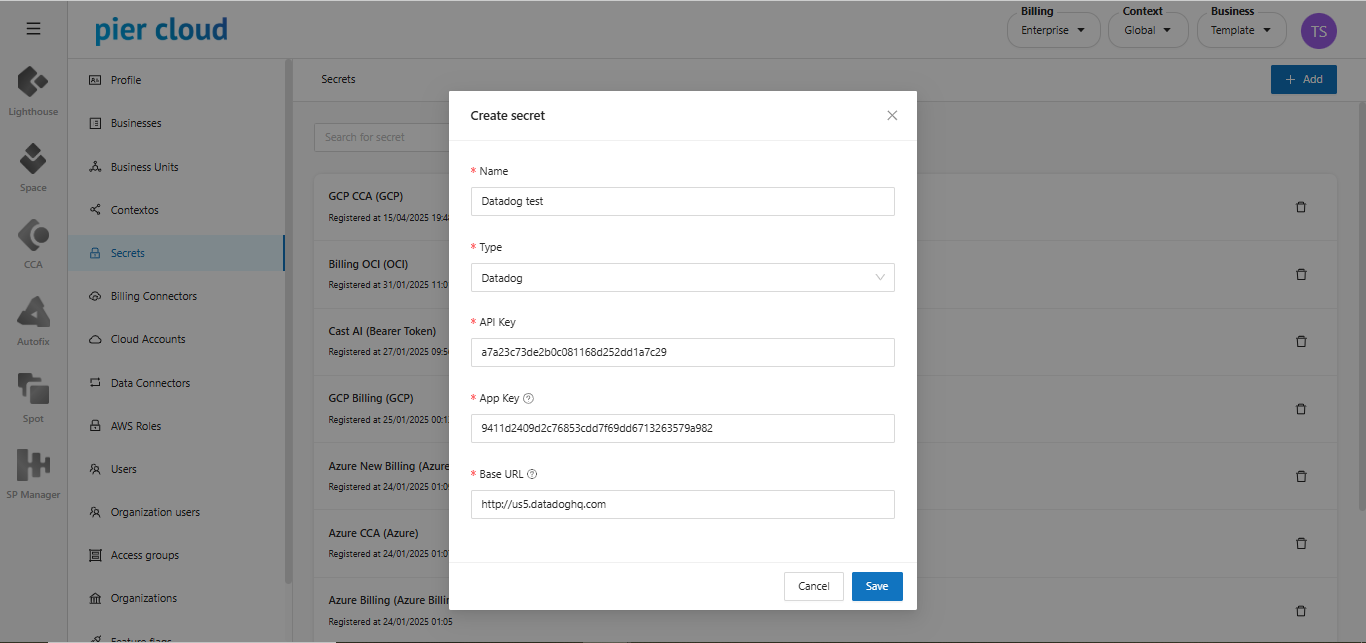
4. In this step we will enter the Secret name, the type and the API Key and Application Key, which were generated in steps 2.2 and 4.3.

In the **Base URL**, the Datadog platform URL will be inserted.

To create the Secret click **Save**.

<figure><img src="https://1687673077-files.gitbook.io/~/files/v0/b/gitbook-x-prod.appspot.com/o/spaces%2FZ9sinLUl52lDK1vg6b8g%2Fuploads%2F2ZBCyebo8bk439cGhg9j%2Fimage.png?alt=media&#x26;token=5a728f40-9608-4b1f-8cca-517b6c7ef8a5" alt=""><figcaption></figcaption></figure>

5. That's it, Secret created as shown in the image below:

Agora precisamos criar o **Data Connector**

<figure><img src="https://1687673077-files.gitbook.io/~/files/v0/b/gitbook-x-prod.appspot.com/o/spaces%2FZ9sinLUl52lDK1vg6b8g%2Fuploads%2FUO7MufxxKpS2kZqXAB6S%2Fimage.png?alt=media&#x26;token=7c1ae72d-3ed5-4112-b50f-e39413942caa" alt=""><figcaption></figcaption></figure>

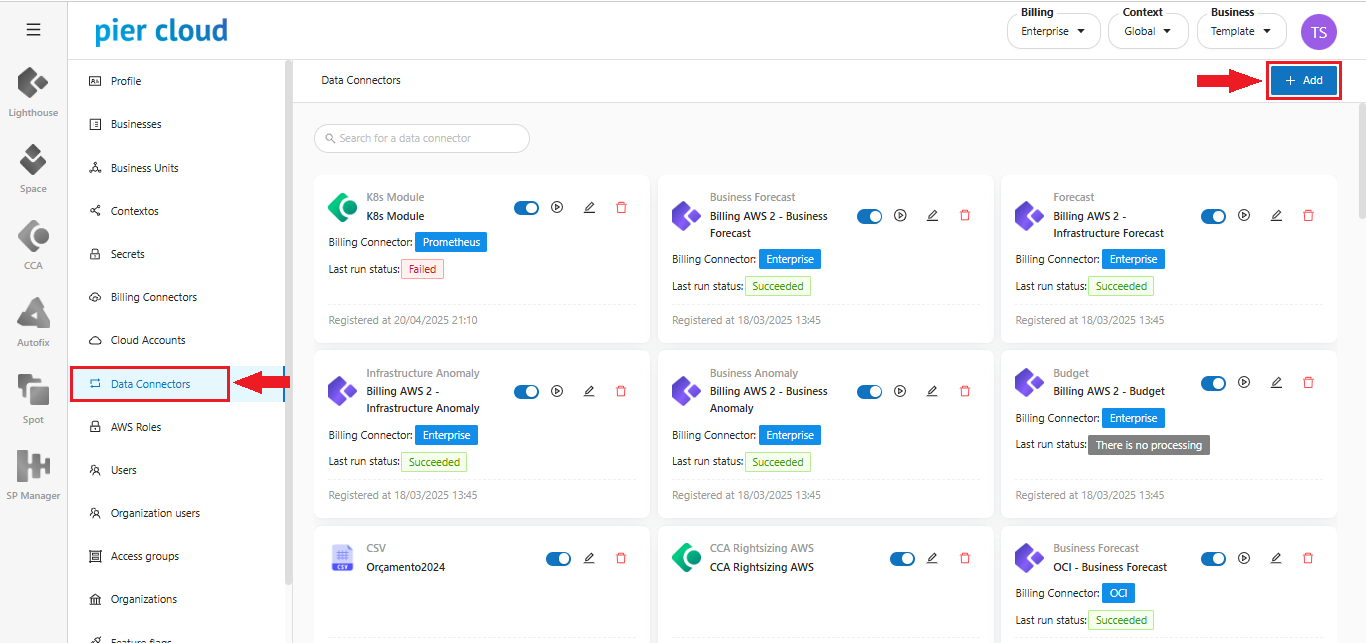
6. In the Menu on the left, click on **Data Connectors**, and then click on **+ Add** in the upper right corner, to create the data connector.

<figure><img src="https://1687673077-files.gitbook.io/~/files/v0/b/gitbook-x-prod.appspot.com/o/spaces%2FZ9sinLUl52lDK1vg6b8g%2Fuploads%2F1y3vu9wiDsjy7axKOJwK%2Fimage.png?alt=media&#x26;token=5ea6012a-4c4d-42ca-bc3f-dd0d8d402d49" alt=""><figcaption></figcaption></figure>

7. In this step, we must insert:

* In the "**Data Connector**" field, we must select the Datadog option.
* In the "**Data Connector Identifier Name**" field, we will enter the name to identify the Data Connector.
* In the "**Select Access Secret**" field, we must select the secret that we created in the previous step.
* Then click **save**.

**Note**: Below in the blue selection are the metrics, which are already set as default.

<figure><img src="https://lh7-rt.googleusercontent.com/slidesz/AGV_vUexfHvL1hBFK6Dfrc-V0VPOAYbUrNZZO7msmJMzqC_Q_IOwzLp5p2R_5ni3cYsp-68Xq4viAg0T0LSVTKs19JcgQSsVCvsm0SG7f1sG-H2Mr9mDMdUyPVD8IfZMl9jyRTyYQL6LudHYW6pdD6ckUlMuQ92dYtImBCPoW6UvsXPkfg=s2048?key=f42TckAHfw7FOkWO0ZMHHQ" alt="" width="563"><figcaption></figcaption></figure>

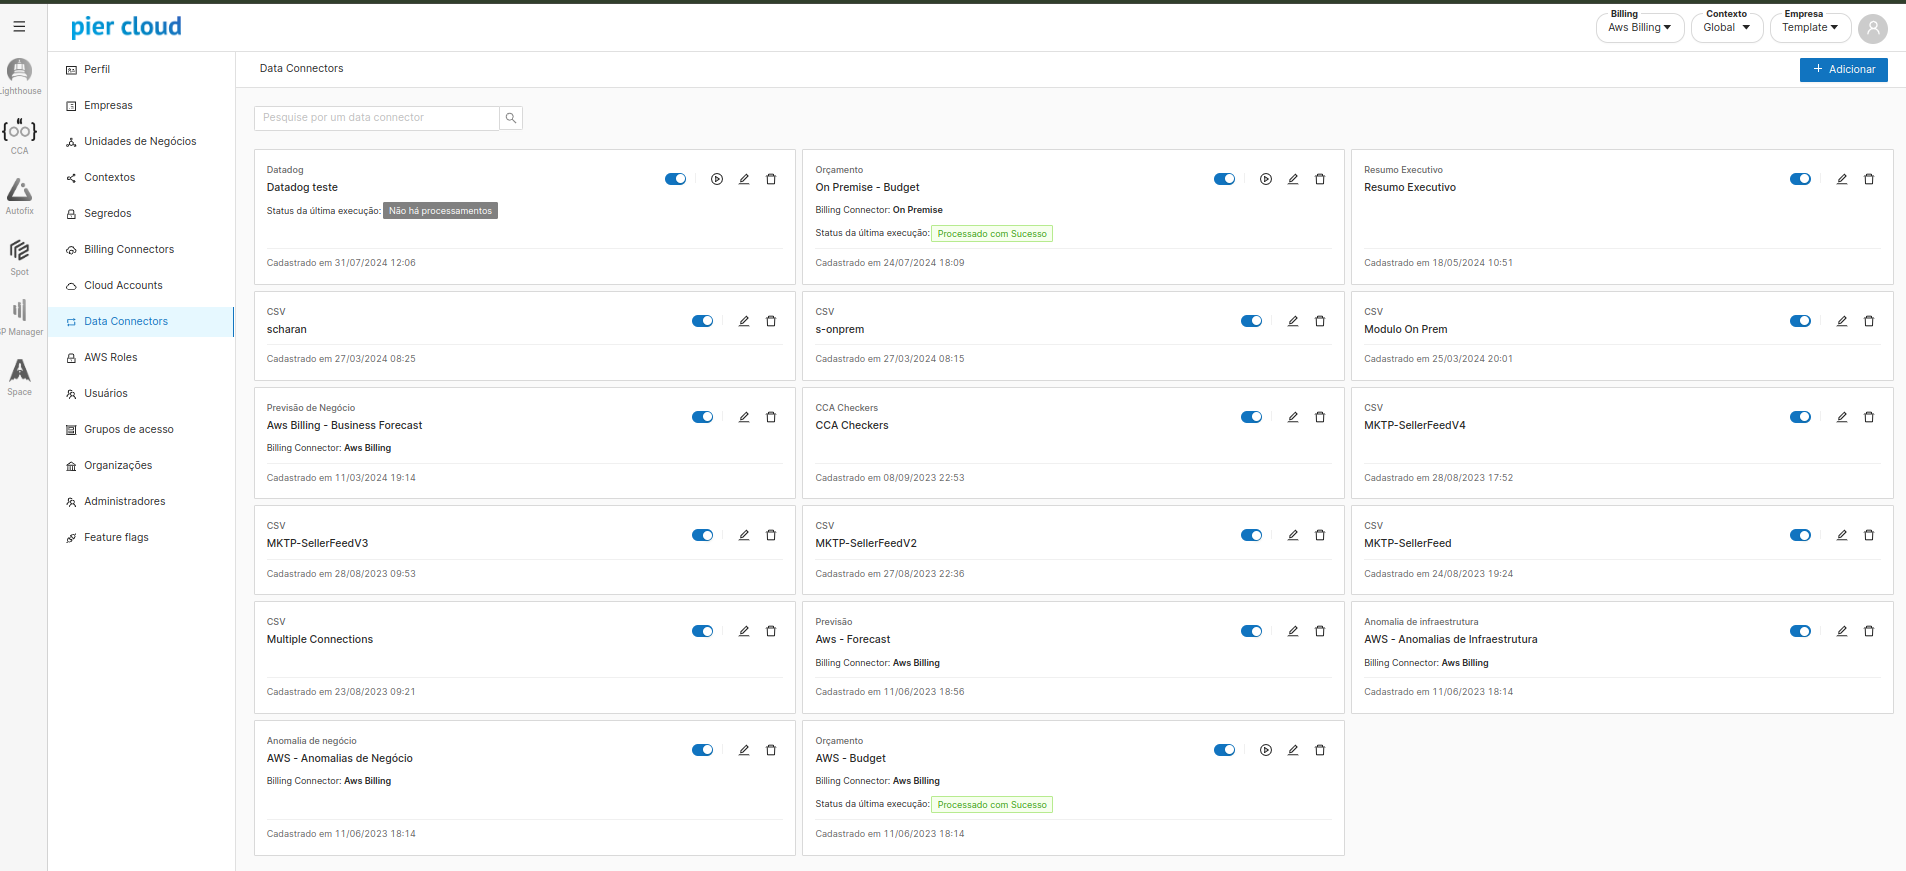
8. Here you can view the created Data Connector.

**That's it, the setup is complete!**

<figure><img src="https://1687673077-files.gitbook.io/~/files/v0/b/gitbook-x-prod.appspot.com/o/spaces%2FZ9sinLUl52lDK1vg6b8g%2Fuploads%2FkKUVapkOxE3X7vSxua8z%2Fimage.png?alt=media&#x26;token=6aea159f-93b8-4df4-8801-38f5f1b603cc" alt=""><figcaption></figcaption></figure>
