# Microsoft Teams

**A service offered by Pier Cloud that allows our FinOps platform to integrate with Microsoft Teams for sending notifications related to identified anomalies and triggered alerts.**\
This document describes the steps required to configure and manage this integration, ensuring that your teams efficiently receive notifications and have access to the information they need.

### Connecting Microsoft Teams to the Pier Cloud Platform

#### Step 1: Accessing Settings

1. Click on the **user profile**, then select **Settings**, as illustrated below:

<figure><img src="https://1687673077-files.gitbook.io/~/files/v0/b/gitbook-x-prod.appspot.com/o/spaces%2FZ9sinLUl52lDK1vg6b8g%2Fuploads%2FCHGnCUyHOqrLdvbEFWZr%2Fimage.png?alt=media&#x26;token=7da4de41-e9f5-4322-842b-1e68047488bf" alt=""><figcaption></figcaption></figure>

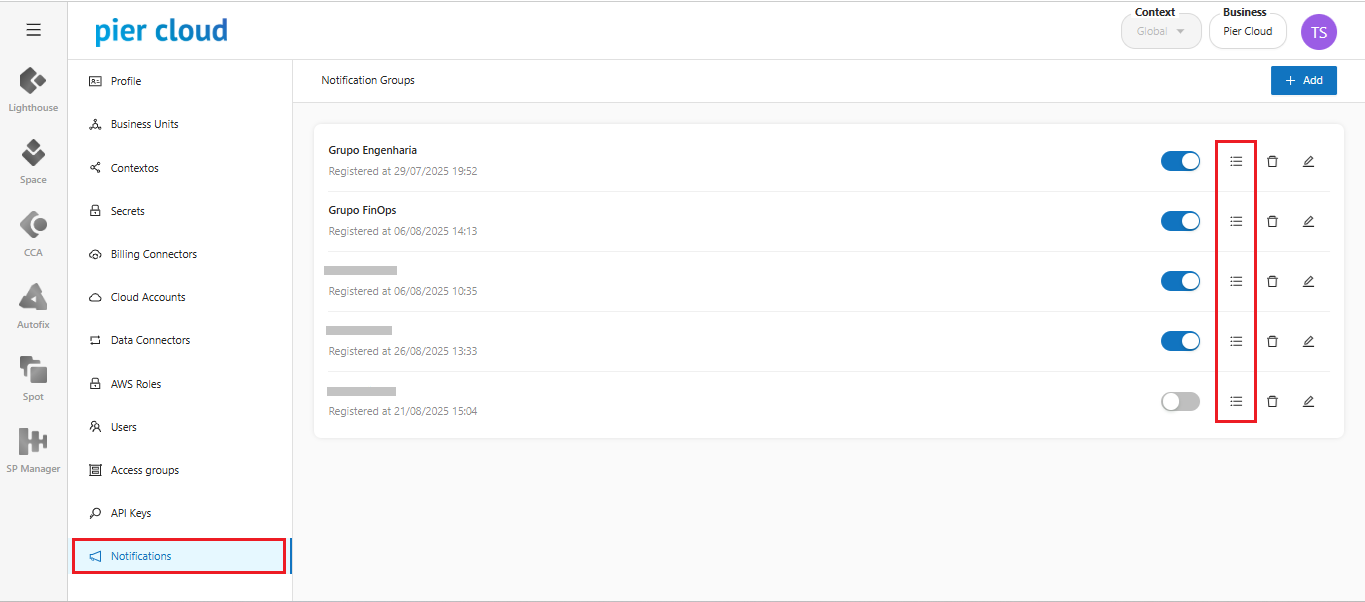
2. The system will display a side menu with several configuration options. Select **Notifications**.

<figure><img src="https://1687673077-files.gitbook.io/~/files/v0/b/gitbook-x-prod.appspot.com/o/spaces%2FZ9sinLUl52lDK1vg6b8g%2Fuploads%2FxZSEw4DUUEBSqIQldX1l%2Fimage.png?alt=media&#x26;token=e99692bb-21db-40d2-8ec6-37b826d9e0c2" alt=""><figcaption></figcaption></figure>

3. By clicking the "![](https://1687673077-files.gitbook.io/~/files/v0/b/gitbook-x-prod.appspot.com/o/spaces%2FZ9sinLUl52lDK1vg6b8g%2Fuploads%2FGhH2eTQSEu27Te2h88OM%2Fimage.png?alt=media\&token=4a99072b-b5af-4dad-bd2a-88e34f9a8e79)" icon, the system allows you to view the registered provider groups and add new ones.

<figure><img src="https://1687673077-files.gitbook.io/~/files/v0/b/gitbook-x-prod.appspot.com/o/spaces%2FZ9sinLUl52lDK1vg6b8g%2Fuploads%2Funq0mE8s5T4jGCfdVOFh%2Fimage.png?alt=media&#x26;token=04debd93-8e2b-4b8e-8abb-19fd17ac75d9" alt=""><figcaption></figcaption></figure>

4. The system will then display a screen requesting the following information:
   * **Select type:** Teams
   * **Name:** Enter a name to identify the provider group

<figure><img src="https://1687673077-files.gitbook.io/~/files/v0/b/gitbook-x-prod.appspot.com/o/spaces%2FZ9sinLUl52lDK1vg6b8g%2Fuploads%2FZ6uozoJtomDxRbqlSi4w%2Fimage.png?alt=media&#x26;token=13d5919d-c82c-470a-86df-9ecd0ccf9c2d" alt="" width="563"><figcaption></figcaption></figure>

***

#### Step 2: Identifying the Webhook URL

In **Settings**, the following additional fields must be completed:

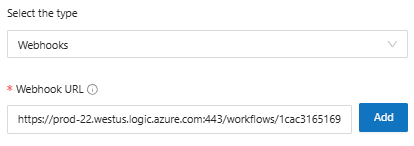
* **Select type:** Choose the *Webhook* option.
  * **Webhooks:** This option allows notifications to be directed to one or more Teams channels.

When selecting this option, the following field will be displayed:

* **Webhook URL:** Enter the Webhook URL and click **Add**. To obtain the URL, go to the channel’s Workflow settings.

***

#### How to Obtain the Webhook URL

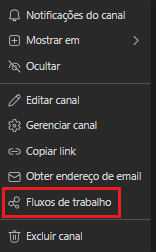
1. Go to the channel where you want to receive notifications.
2. Right-click on the channel and select **Workflows**.

<figure><img src="https://1687673077-files.gitbook.io/~/files/v0/b/gitbook-x-prod.appspot.com/o/spaces%2FZ9sinLUl52lDK1vg6b8g%2Fuploads%2F8f9Nj6RV9VpgZnL38YX3%2Fimage.png?alt=media&#x26;token=4a541015-dd8d-4ae2-b135-762198881626" alt=""><figcaption></figcaption></figure>

3. The **Workflows** screen will open. Search for **Webhook** and select the following template returned by the system:

   **Templates → Post to a channel when a webhook request is received.**

<figure><img src="https://1687673077-files.gitbook.io/~/files/v0/b/gitbook-x-prod.appspot.com/o/spaces%2FZ9sinLUl52lDK1vg6b8g%2Fuploads%2FlTZxRpsfPmxgWfqd6vBa%2Fimage.png?alt=media&#x26;token=f3a137a4-326c-4b17-ad47-d21e89e713f4" alt=""><figcaption></figcaption></figure>

4. On the next screen, once loading is complete and the email displayed has a green arrow, click **Next**.

<figure><img src="https://1687673077-files.gitbook.io/~/files/v0/b/gitbook-x-prod.appspot.com/o/spaces%2FZ9sinLUl52lDK1vg6b8g%2Fuploads%2Fy3Dvmc6hcBYvTjNO6hd7%2Fimage.png?alt=media&#x26;token=c7288ef3-63fb-475f-a93e-3d6e20bbb59b" alt=""><figcaption></figcaption></figure>

5. Confirm the displayed information:
   * **Microsoft Teams Team**
   * **Microsoft Teams Channel**

<figure><img src="https://1687673077-files.gitbook.io/~/files/v0/b/gitbook-x-prod.appspot.com/o/spaces%2FZ9sinLUl52lDK1vg6b8g%2Fuploads%2Ft1H30YqxaWynt58Y2EOK%2Fimage.png?alt=media&#x26;token=f1eee252-fcee-48a9-bff8-94af763a615f" alt=""><figcaption></figcaption></figure>

6. Then click **Add Workflow**.
7. A screen will appear showing the **Webhook Link**.
   * Click **Copy** and then **Done**.

<figure><img src="https://1687673077-files.gitbook.io/~/files/v0/b/gitbook-x-prod.appspot.com/o/spaces%2FZ9sinLUl52lDK1vg6b8g%2Fuploads%2FIXLKKZE8iZXp3uX5VPjJ%2Fimage.png?alt=media&#x26;token=3d7489b3-be08-4eb1-a2a3-2afed90230ac" alt=""><figcaption></figcaption></figure>

8. Once you have copied the Webhook URL, return to the provider registration screen in the Pier Cloud platform, paste the copied information, and click **Add**.

<figure><img src="https://1687673077-files.gitbook.io/~/files/v0/b/gitbook-x-prod.appspot.com/o/spaces%2FZ9sinLUl52lDK1vg6b8g%2Fuploads%2F1LpvR0LaE0foDV3Bj7nd%2Fimage.png?alt=media&#x26;token=3258c350-0ba5-4061-8e05-7b129bda5fcf" alt=""><figcaption></figcaption></figure>

#### Step 3: Saving the Configuration

Once all required fields are completed, click **Save**. The system will store the data and return to the main screen, where you can view the registered provider within the notification group.
