# Start - Stop
## Overview
Start / Stop is an Autofix module feature developed to automate the operating cycle of cloud resources. Unlike *Smart Stop* (which acts based on technical idleness), Start / Stop operates based on defined schedules, making it ideal for environments with predictable usage hours. The central objective is to align infrastructure execution time with actual business needs.
## Business Objective
Many companies keep resources active 24/7 unnecessarily, creating what we call "availability waste". Start / Stop resolves this issue in scenarios such as:
* **Development and Sandbox:** Environments that only need to be active during developers' working hours.
* **Internal Systems:** HR applications or Intranets used only during business hours.
* **Testing and QA:** Resources that can remain turned off during weekends and holidays.
* **Operational Efficiency:** Immediate reduction of *compute* costs without daily manual intervention.
***
## Supported Resources
Start / Stop can manage the lifecycle of various services, including:
* **EC2:** Computing instances.
* **RDS:** Relational database instances and clusters.
* **Others:** Compatible resources according to the capabilities of each provider (AWS/Azure).
***
## How It Works: The Scheduling Cycle
Automation is configured through an intuitive workflow divided into three stages:
#### 1. Scope Definition
The user determines exactly which resources will be affected:
* **Geographic Filters:** Selection by specific Accounts and Regions.
* **Identification:** Locating resources via Tag, Name, or Resource ID.
#### 2. Action Definition
The command to be sent to the resource is configured:
* **Start:** Triggering (turning on) the resources.
* **Stop:** Shutting down the resources.
* *Note: It is common to create complementary rules (one to turn on at 08h and another to turn off at 18h).*
#### 3. Schedule Configuration
Definition of the operational calendar:
* **Days:** Selection of the days of the week (e.g., Monday to Friday).
* **Times:** Definition of the exact hour for the trigger.
* **Execution:** The system processes the action automatically according to the configured time zone.
***
## FinOps Impact
This functionality is one of the fastest ways to obtain ROI in FinOps projects:
* **Operational Cost Reduction:** Avoids paying for unused processing hours.
* **Financial Predictability:** Facilitates monthly savings calculations (e.g., turning off a resource on the weekend saves \~28% of the monthly cost).
* **Automated Governance:** Transforms cost policies into systematically applied technical rules.
***
## Best Practices
* **Safe Start:** Begin by applying rules in development or testing environments.
* **Control Tags:** Use tags to identify resources participating in the Start / Stop program, facilitating audits.
* **Mirrored Rules:** Always check if there is a corresponding "Start" rule for every "Stop" rule, preventing teams from being stalled at the start of the workday.
* **Schedule Review:** Periodically adjust schedules to reflect changes in time zones or team work shifts.
***
#### For use and access in the Pier platform:
Start - Stop is an Autofix feature where it is possible to automate the process of starting and stopping existing instances in the environment, based on a key and value.
**For AWS -** Start Stop currently covers 3 services: **EC2, RDS, and Redshift**.
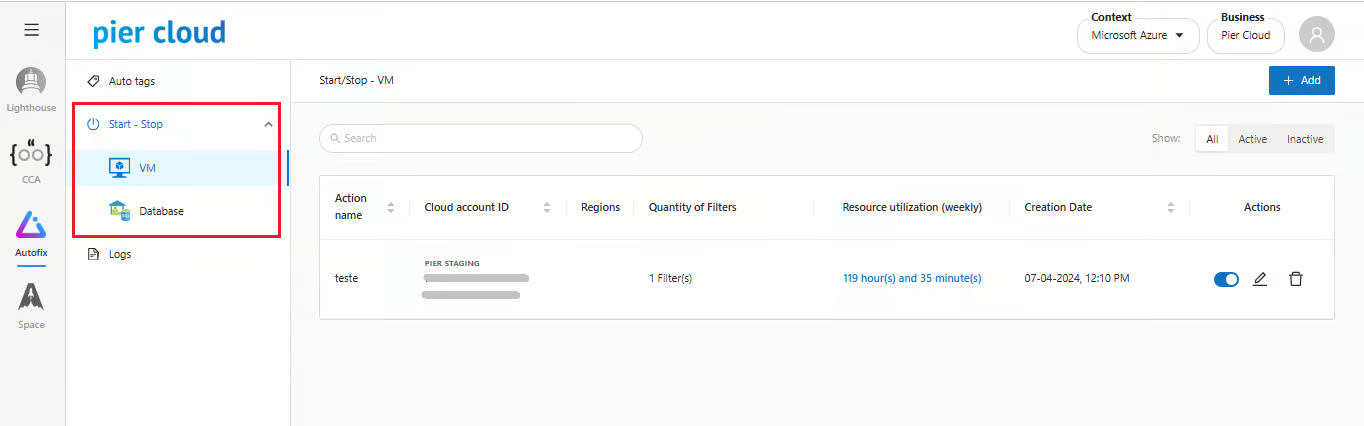
**For Azure -** Start - Stop currently covers 2 services: **VMs and Databases**.
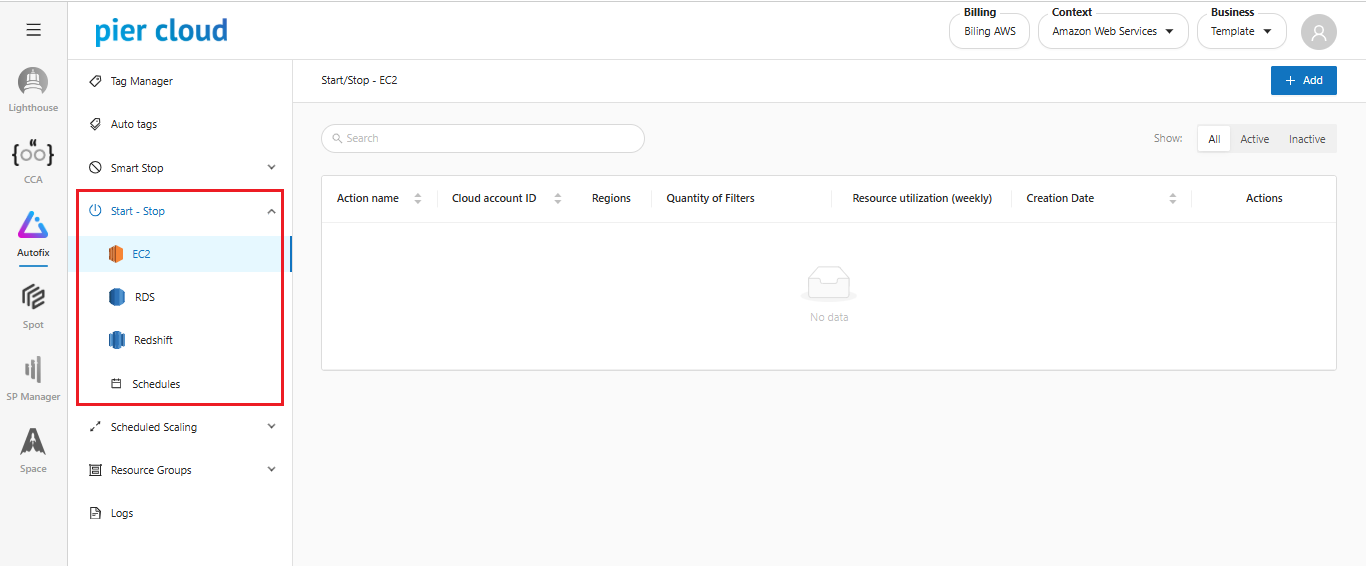
1. **Accessing Start-Stop**.
In the Autofix side menu, select **Start-Stop**.
Select the service: **EC2, RDS or Redshift**
For Azure context: Select the service: **VM or Database**.
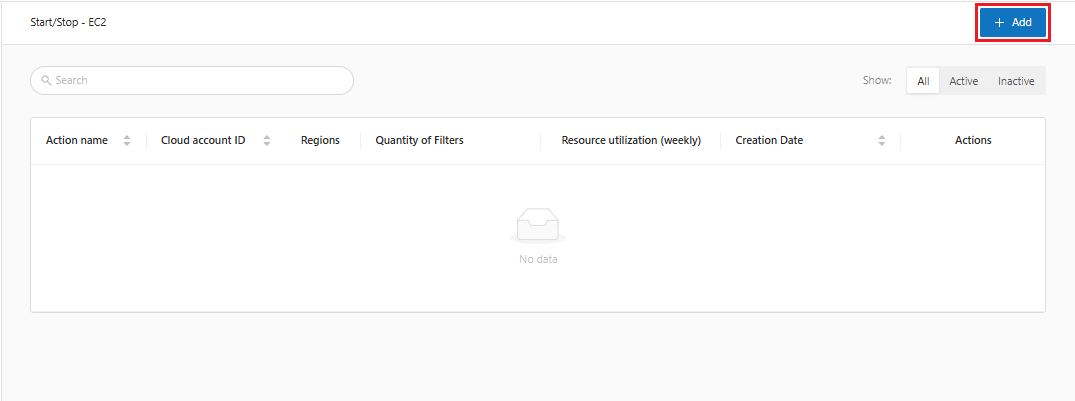
2. **Creating an Action**.
On the main screen, click the "**Add**" button
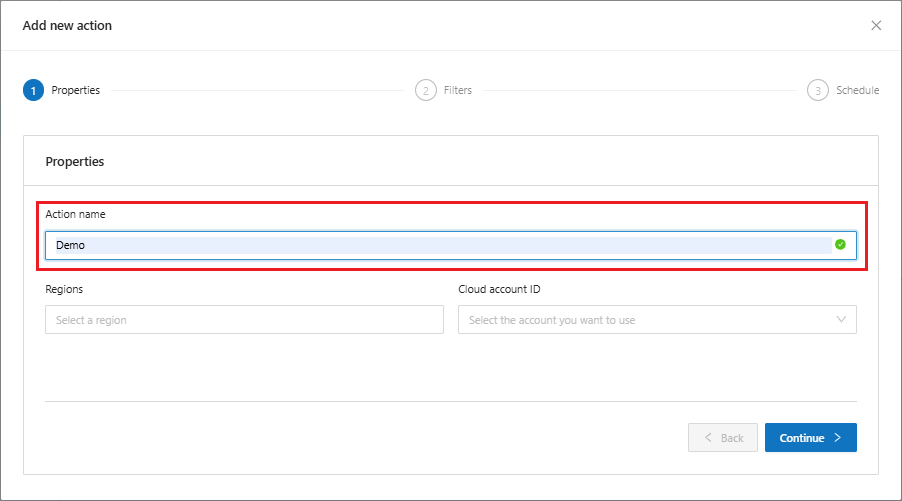
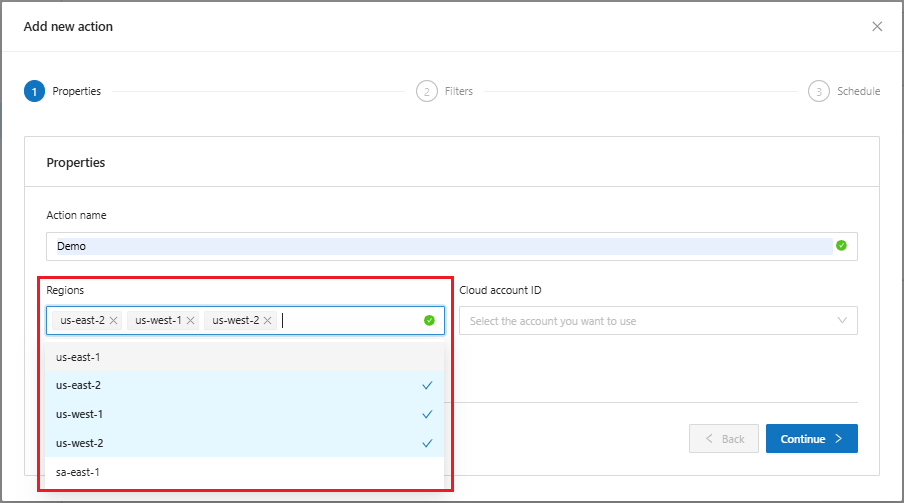
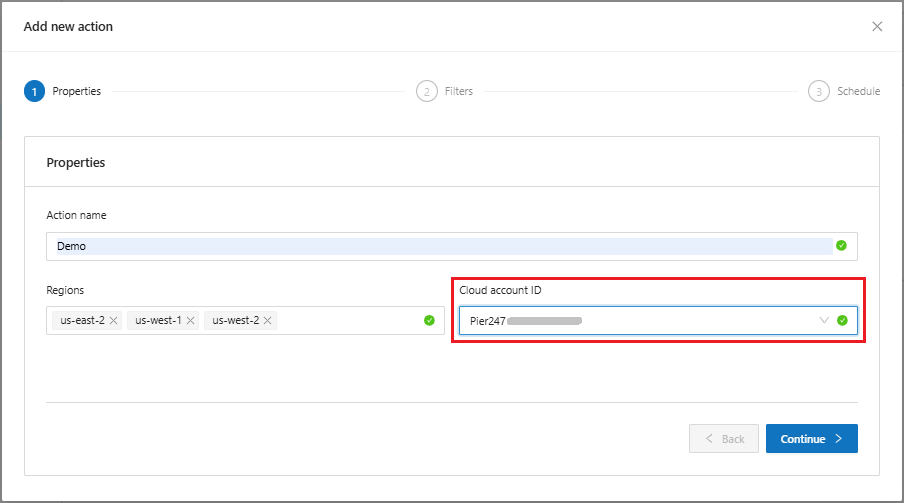
3. **Properties**
In properties, start the **Start - Stop** configuration process
* Define the name of the action
* Define the region, more than one region can be selected. **(For AWS Context Only)**
* Select the account ID to which the action will be applied.
Click on continue to proceed with the creation.
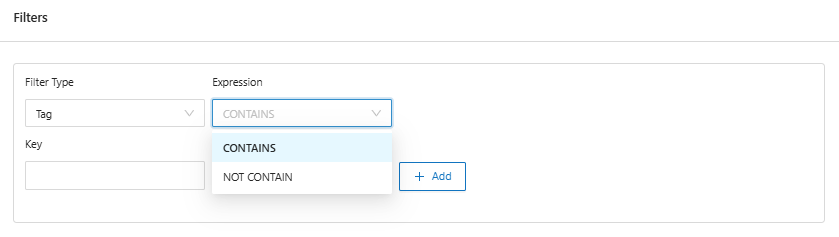
4. **Filters**
When you click the continue button, the system will advance to the filters screen, where it is possible to add the desired filters.
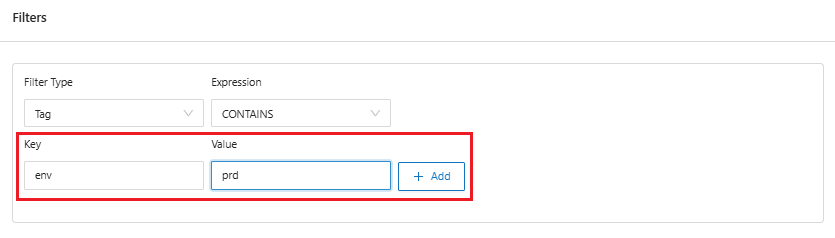
The filters are where Autofix will locate the resources via key and value.
* In "Filter **Type**", it is possible to locate the resource in three ways: **tag, resource name, and resource id**. (**AWS context only; for Azure, only by Tag)**
* Define the expression **CONTAINS** and **DOES NOT CONTAIN**. (**AWS context only; for Azure, only CONTAINS)**
* In key and value, add the resource identification so Autofix can find it.
* When adding, it is possible to view the filter of the created resource
On the right, it is possible to **edit** and **delete** the filter already created.
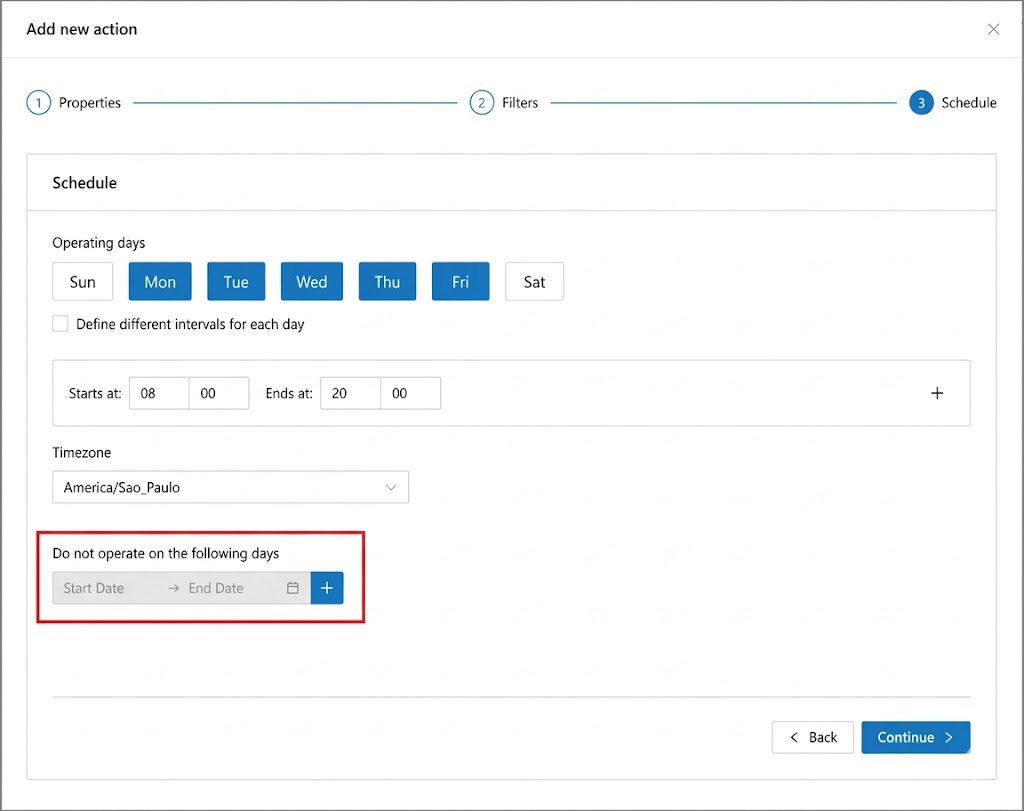
5. **Schedule**
When you click the **continue** button, the system will advance to the schedule screen.
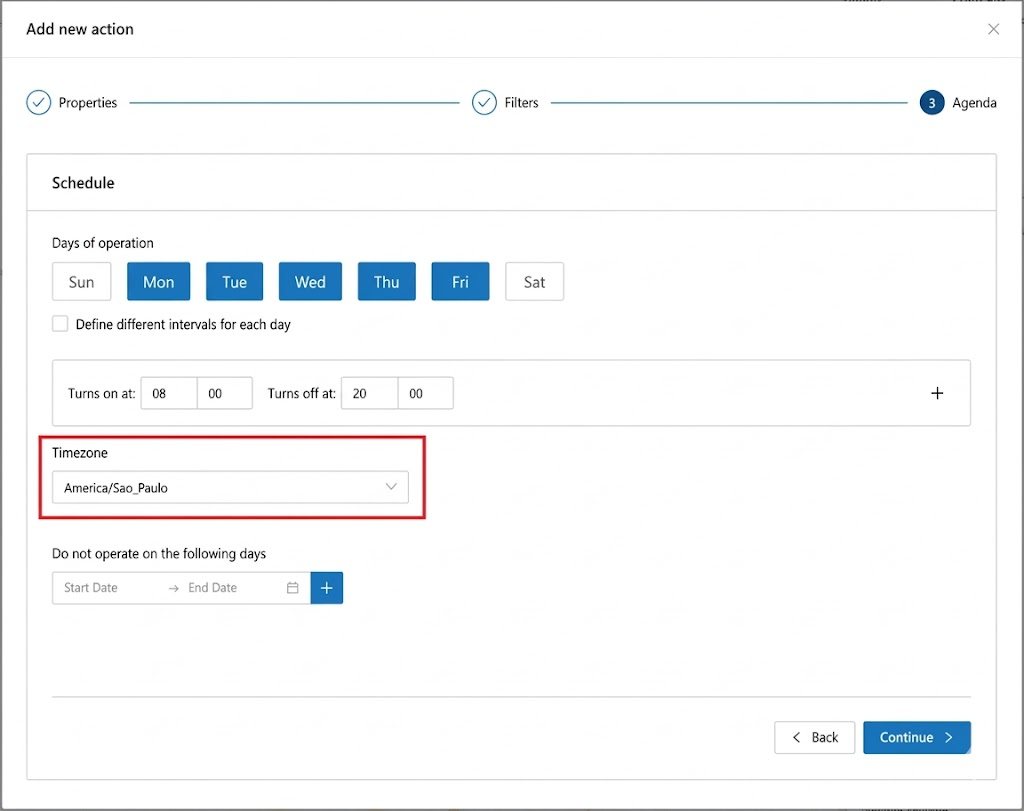
In the schedule, define the operating period for the rule.
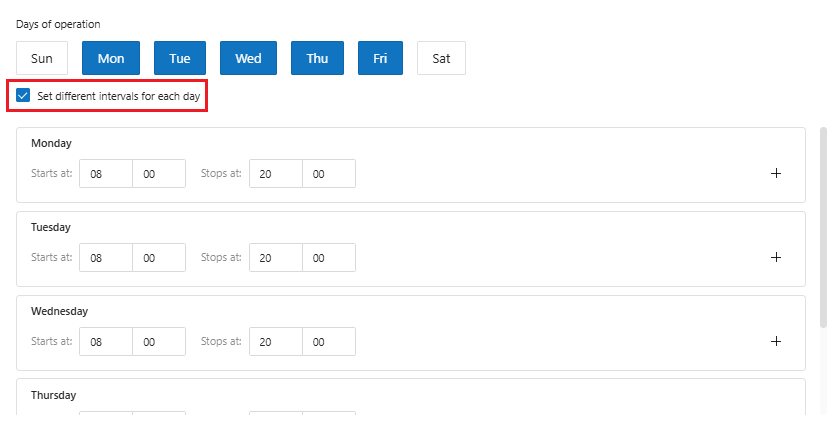
* It is possible to define the days of the week when the resource will operate, as well as the time when the resource should be started and stopped.
* In the "**define different intervals for each day**" option, it is possible to customize the execution time for each day of the week.
* Set the resource's **timezone** so that there is no time difference.
* It is possible to define operating exceptions for the rule, for days when the rule should not function.
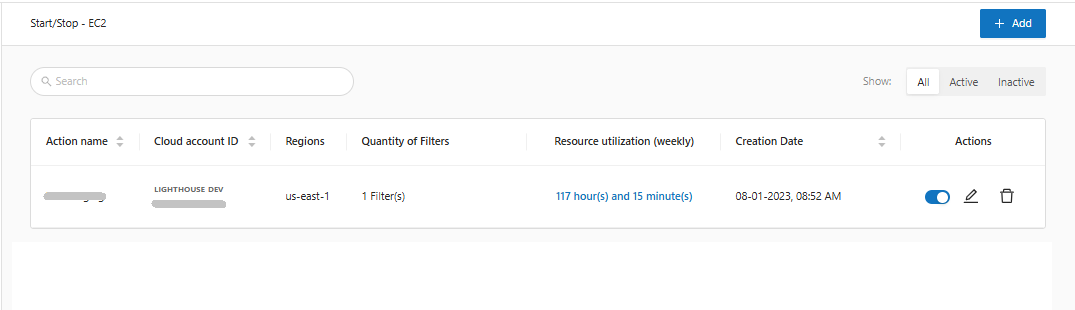
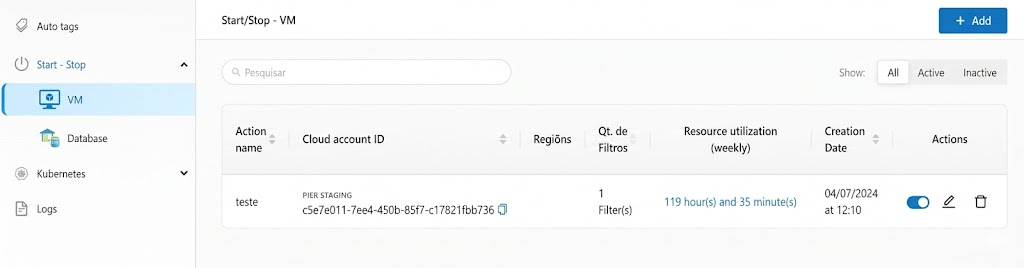
6. **View created action - AWS**
**View created action - Azure**
After creating the rule, the configuration is visible on the home screen, where it is possible to **turn off** the rule, **edit** and **delete** the created rule.